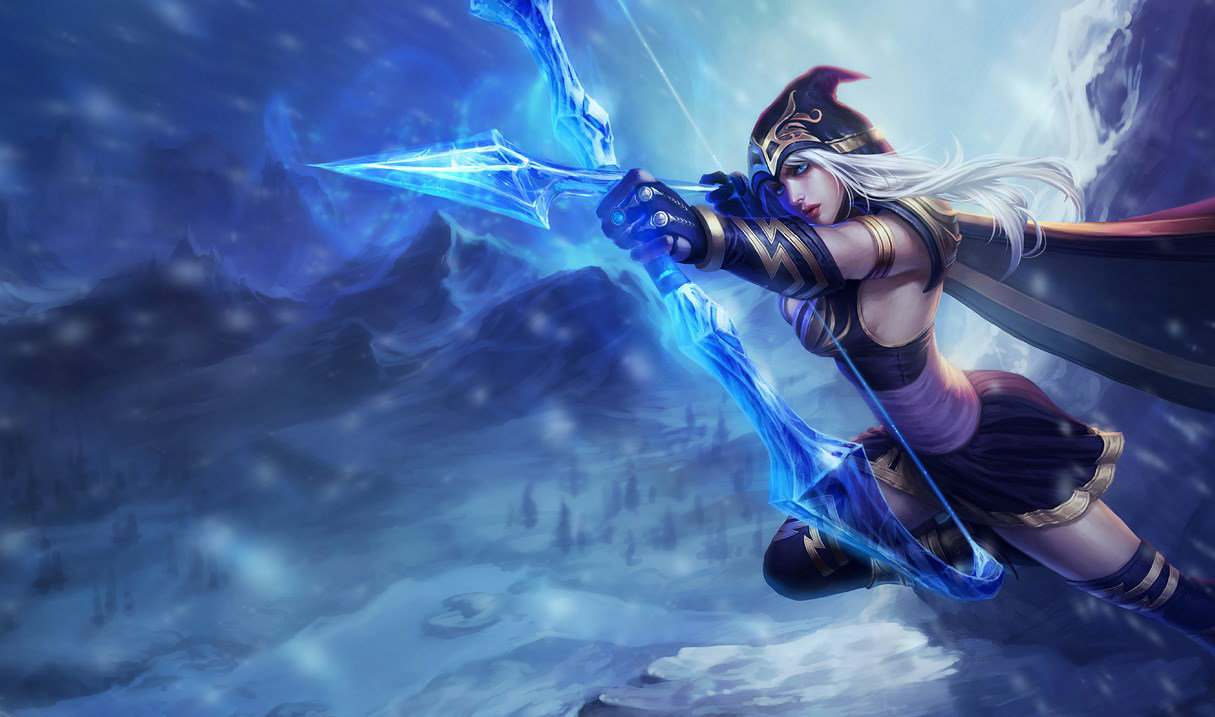

Ashe
The Frost Archer
How this differs from the live game
- Frost Shot (Q) toggles slowing basic attacks
- Focus (P) builds up critical strikes out of combat
- Hawkshot (E) grants bonus gold on kill
Build


Runes and masteries
 x9Mark of Attack DamageMark
 x9Seal of ArmorSeal
 x9Glyph of Magic ResistGlyph
 x3Quintessence of Attack DamageQuint
- Attack Damage +15.75
- Armor +9.00
- Magic Resist +12.60
Flat AD marks and quints improve last hitting and directly increase Volley because W deals 100% AD. Armor seals are for trades against the enemy marksman, while MR glyphs cover support poke and mid-game magic damage.
 0/1
0/1 4/4
4/4 0/4
0/4 0/2
0/2 4/4
4/4 0/4
0/4 0/1
0/1 3/3
3/3 1/1
1/1 0/1
0/1 2/2
2/2 2/2
2/2 0/3
0/3 0/1
0/1 1/1
1/1 3/3
3/3 0/4
0/4 1/1
1/1 0/1
0/1 0/3
0/3 4/4
4/4 0/2
0/2 3/3
3/3 1/3
1/3 0/1
0/1 0/2
0/2 0/2
0/2 1/1
1/1 0/1
0/1 0/1
0/1 0/3
0/3 0/3
0/3 0/1
0/1 0/3
0/3 0/1
0/1 0/1
0/1 0/1
0/1 0/1
0/1 0/3
0/3 0/3
0/3 0/1
0/1 0/1
0/1 0/3
0/3 0/3
0/3 0/2
0/2 0/4
0/4 0/1
0/1 0/3
0/3 0/1
0/1 0/2
0/2 0/4
0/4 0/3
0/3 0/1
0/1 0/1
0/1 0/3
0/3 0/1
0/1This is a standard 21/9/0 Season 3 marksman page: offense gives AD, armor penetration, crit scaling, and Executioner, while defense reaches Veteran's Scars legally by spending 8 points in higher defense rows first.
Skill order
ultimate at 6, 11 and 16
Focus
 Frost ShotQ
 VolleyW
 HawkshotE
 Enchanted Crystal ArrowR
- Frost Shot (Q) takes points at levels 4, 8, 10, 12, 13.
- Volley (W) takes points at levels 1, 3, 5, 7, 9.
- Hawkshot (E) takes points at levels 2, 14, 15, 17, 18.
- Enchanted Crystal Arrow (R) takes points at levels 6, 11, 16.
Max Volley first for lane control and AD-scaling poke, take an early Hawkshot point for scouting and gold, then max Frost Shot second for stronger chase and kite control.
Alternative — Max E second instead of Q when the lane is passive and you are safely farming; the extra Hawkshot gold was sometimes valued over stronger mid-game slows.
Why these items
Openingsall within the 475 starting gold


Doran's Blade start — Default all-in and trading start; the AD, health, and on-hit sustain fit standard duo-lane farming.
Boots and potions start — Use into heavy skillshot poke or lanes where dodging hooks/bindings matters more than Doran's combat stats.


Corein buy order
 1
1Infinity Edge3,800gInfinity Edge was Ashe's main damage spike, pairing high AD and crit with Focus-powered critical openings.
 2
2Phantom Dancer2,800gPhantom Dancer supplies the attack speed, crit chance, movement speed, and unit-walking Ashe wants for sustained kiting.
 3
3Last Whisper2,300gLast Whisper keeps her physical damage relevant once frontliners start stacking armor.
Situationalonly when the game asks for it

Mercurial Scimitar3,700gBuy Mercurial Scimitar against dangerous hard CC or Exhaust effects that Cleanse/QSS removal can decide.

Banshee's Veil2,750gBuy Banshee's Veil when a single long-range engage spell or burst combo is preventing you from entering fights.

Ninja Tabi1,000gUse Ninja Tabi instead of Berserker's Greaves against oppressive double-AD lanes or fed auto attackers.

Blade of The Ruined King3,200gBuy Blade of the Ruined King when the enemy team has multiple high-health champions and you need lifesteal plus tank shredding.

Executioner's Calling1,900gBuy Executioner's Calling when your team needs reliable Grievous Wounds against heavy healing or lifesteal.
Build


Runes and masteries
- x9Mark of Magic PenetrationMark
- x9Seal of ArmorSeal
 x9Glyph of Cooldown ReductionGlyph
 x3Quintessence of Ability PowerQuint
- Ability Power +15.00
- Magic Penetration +9.00
- Armor +9.00
- Cooldown Reduction +7.20%
Magic penetration marks are for Enchanted Crystal Arrow, the only Ashe damage spell here that actually reads AP; Volley scales with AD, so AP runes do nothing for it. This page buys AP/CDR arrow pressure at the cost of the ordinary support/ADC durability, gold, attack damage, or attack speed runes.
 1/1
1/1 0/4
0/4 4/40/2
 0/4
0/4 4/40/13/3
 0/1
0/1 1/1
1/1 0/2
0/2 0/2
0/2 3/3
3/3 1/1
1/1 0/1
0/1 0/3
0/3 3/41/10/10/3
 0/40/2
 0/3
0/3 0/30/10/20/2
 0/10/10/10/30/30/10/30/10/10/1
 1/10/3
 3/30/10/1
 3/3
3/3 1/30/20/40/10/3
 1/10/20/40/30/10/10/30/1
This is 21/0/9, built to reach Sorcery, Arcane Knowledge, AP masteries, Executioner, and utility summoner/mana support tools. Compared to a normal support page it gives up deeper utility gold income and ward perks, and compared to normal Ashe it gives up AD/attack-speed combat efficiency.
Skill order
ultimate at 6, 11 and 16Focus
Frost ShotQVolleyWHawkshotEEnchanted Crystal ArrowR- Frost Shot (Q) takes points at levels 4, 8, 10, 12, 13.
- Volley (W) takes points at levels 1, 3, 5, 7, 9.
- Hawkshot (E) takes points at levels 2, 14, 15, 17, 18.
- Enchanted Crystal Arrow (R) takes points at levels 6, 11, 16.
Max Volley first for lane poke and wave control, then Frost Shot for stronger chase and peel, with Hawkshot left mostly for scouting and passive gold. The early E point fits support Ashe because vision and extra gold matter when she is not farming.
Why these items
Openingsall within the 475 starting gold
Faerie ward start — Default support start when you want mana sustain for Volley plus maximum early ward coverage.
Flask ward start — Take this into poke lanes where repeated health and mana refills matter more than opening with three wards.

Corein buy order
 1
1Shard of True Ice1,600gShard of True Ice gives AP, gold income, mana aura, and an active slow that stacks naturally with Ashe's pick-and-peel job.
 2
2Ionian Boots of Lucidity1,000gIonian Boots of Lucidity are the cheapest way to push the build toward frequent Volley and Enchanted Crystal Arrow casts.
 3
3Morellonomicon2,200gMorellonomicon supplies AP, mana regen, and 20% CDR, making the AP/CDR theme actually function.
 4
4Ruby Sightstone1,700gRuby Sightstone keeps the support vision role covered while adding health so Ashe can survive long enough to use arrow and item actives.
Situationalonly when the game asks for it

Mikael's Crucible2,500gBuy Mikael's Crucible when the enemy team has a key stun, snare, fear, or slow that decides fights on your carry.

Twin Shadows1,900gBuy Twin Shadows when your team needs more long-range pick setup before firing Enchanted Crystal Arrow.

Locket of the Iron Solari2,225gBuy Locket of the Iron Solari when teamfights are being decided by AoE burst and your team needs a defensive active.

Banner of Command2,360gBuy Banner of Command when you want armor, CDR, AP, and a siege tool instead of pure burst AP.

Zhonya's Hourglass3,260gBuy Zhonya's Hourglass against dive or assassins when staying alive after starting a fight matters more than Deathfire burst.
One build, written by a player. Newest first.
Write a Ashe buildBuild


Runes and masteries
- x9Mark of Attack DamageMark
- x9Seal of ArmorSeal
- x9Glyph of Cooldown ReductionGlyph
- x3Quintessence of Attack DamageQuint
- Attack Damage +15.75
- Armor +9.00
- Cooldown Reduction +7.20%
Cooldown reduction glyphs. Every point of it is another Volley.
1/10/44/4 2/24/40/40/13/31/10/10/22/20/30/10/13/30/41/10/10/30/40/20/30/30/10/20/20/10/10/10/30/30/10/30/10/10/11/10/33/3
 1/10/10/33/30/20/4
 1/10/30/10/20/40/30/10/10/30/1
21/0/9. The author's alternative: if you run Ionian Boots of Lucidity instead of Swiftness, take Fury over Sorcery.
Skill order
ultimate at 6, 11 and 16Focus
Frost ShotQVolleyWHawkshotEEnchanted Crystal ArrowR- Frost Shot (Q) takes points at levels 3, 14, 15, 17, 18.
- Volley (W) takes points at levels 1, 4, 5, 7, 9.
- Hawkshot (E) takes points at levels 2, 8, 10, 12, 13.
- Enchanted Crystal Arrow (R) takes points at levels 6, 11, 16.
W max first, and it is not close. Q is a single point until the very end.
Why these items
Openingsall within the 475 starting gold
Doran's Blade start — The default: Volley scales off attack damage, so the blade is not wasted.
Long Sword start — When you are building straight into the Elder Lizard.

Corein buy order
 1
1Spirit of the Elder Lizard2,000gCooldown reduction and the damage that makes Volley hurt at all.
 2
2The Black Cleaver3,000gArmour shred that stacks off a spell that hits five targets at once.
 3
3Youmuu's Ghostblade2,700gMore cooldown reduction, and the active for the fights you have to walk into.
Situationalonly when the game asks for it
Ionian Boots of Lucidity1,000gInstead of Boots of Swiftness — take Fury over Sorcery if you do.
Notes
the author's own wordsW Spam Ashe
Off-meta.  maxed first, cooldown reduction on the glyphs, and every item buys flat attack damage rather than crit — Volley does not crit, so nothing is lost.
"If you wanna do Lucidity instead of Swifties, run Fury over Sorcery."
Build by kriskitti, transcribed from the League Classic Wiki archive.
Abilities
per rank P
PFocus
Ashe gains stacks of Focus while out-of-combat. When Ashe has 100 stacks of Focus, her next basic Attack will critically strike.
 Q
QFrost Shot5 ranks
While active, each of Ashe's basic attacks slow her targets. This drains Mana with each attack.
- Cooldown
- 1s
- Range
- 400
WVolley5 ranks
Ashe fires 7 arrows in a cone for increased damage. Volley also applies Ashe's current level of Frost Shot.
- Damage
- 40 / 50 / 60 / 70 / 80 + 100% AD
- Cooldown
- 16 / 13 / 10 / 7 / 4s
- Cost
- 60 Mana
- Range
- 1200
 E
EHawkshot5 ranks
Each time Ashe kills a unit, she gains some extra gold. Ashe can activate to send her Hawk Spirit on a scouting mission.
- Cooldown
- 60s
- Range
- 2500 / 3250 / 4000 / 4750 / 5500
 R
REnchanted Crystal Arrow3 ranks
Ashe fires a missile of ice in a straight line. If the arrow collides with an enemy Champion, it deals damage and stuns the Champion for up to 3.5 seconds, based on how far the arrow has traveled. In addition, surrounding enemy units take damage and are slowed.
- Main Damage
- 250 / 425 / 600 + 100% AP
- Splash Damage
- 125 / 212.5 / 300 + 50% AP
- Cooldown
- 100 / 90 / 80s
- Cost
- 150 Mana
- Range
- All map (global)
Matchup against
62 champions, one-on-one
AhriUnfavoured
Ahri wins if she lands Charm because Spirit Rush lets her stay inside Ashe's damage window while dodging Volley and kiting back out.
Watch for Charm: it stops Ashe long enough for Orb of Deception, Fox-Fire, and a Spirit Rush reposition to take the duel away.
How to beat
Hold just outside 550 range and make Ahri spend Orb of Deception on the wave or miss Charm before you commit. If Charm is down, Ashe can tag her with Frost Shot and walk her down until Spirit Rush is forced. Save Enchanted Crystal Arrow for after a dash, not before she has shown where she is going.
Later Finished Ahri is still favored in side lane because she can force or escape the duel with Spirit Rush. Ashe is more valuable in grouped fights if she stays behind frontline and uses Arrow to start before Ahri can flank.
- Do not chase in a straight line through the returning Orb of Deception.
- Volley after Ahri dashes, since Spirit Rush can sidestep the cone easily.
- If Charm is available, treat your 600 range as poke range, not all-in range.
- Arrow is strongest when Ahri has spent one or two Spirit Rush charges.
Buy



AkaliUnfavoured
Akali's repeated Shadow Dance gap closes and Twilight Shroud deny Ashe the spacing she needs to win with Frost Shot autos.
Watch for Shadow Dance: it removes Ashe's range advantage and lets Akali re-enter after being slowed.
How to beat
Punish Akali before level 6 and keep the wave or minions between you only insofar as they help you kite away from Shroud. Once she has Shadow Dance, do not stand in range unless Enchanted Crystal Arrow is ready and Twilight Shroud has been used. Commit only after she spends a dash charge or wastes Shroud defensively.
Later Akali wins isolated side-lane fights if she can find Ashe without peel. Ashe should avoid solo fog paths and play grouped, where Arrow and sustained DPS punish Akali after she commits.
- Do not fire Arrow blindly into Twilight Shroud unless her exit path is forced.
- Back away from Shroud instead of standing at its edge trading into invisibility.
- Use Volley immediately after Akali dashes in to slow her before she chains another Shadow Dance.
- If Akali marks you with Mark of the Assassin, create distance before she procs it.
Buy
AlistarFavoured
Ashe beats Alistar in a pure duel as long as she never gives him a clean Pulverize range and kites through his cooldowns.
Watch for Headbutt: it can knock Ashe into a wall, tower, or follow-up Pulverize range and erase her spacing.
How to beat
Stay at max attack range and use Frost Shot to make Alistar spend Headbutt just to create space rather than start a combo. If he uses Headbutt or Pulverize and does not lock you down, keep walking backward and keep attacking. Do not waste burst into Unbreakable Will; kite until its damage reduction ends.
Later Alistar does not want a side-lane duel with Ashe unless he can pin her near terrain, but he is much more important as a teamfight disruptor. Ashe should hold Arrow for either his engage path or the carry behind him, then avoid hitting into Unbreakable Will unless there is no better target.
- Do not stand between Alistar and his tower or a wall.
- If Unbreakable Will is active, use the time to reposition instead of trying to finish him.
- Volley is best after Pulverize misses, when he cannot punish the cast time.
- Frost Shot keeps him from walking into Pulverize without Flash or Headbutt.

AmumuFavoured
Ashe wins at range because Amumu must land Bandage Toss to start any meaningful duel and is very kiteable after it misses.
Watch for Bandage Toss: it stuns Ashe and pulls Amumu into Curse of the Sad Mummy range.
How to beat
Hold 600 range and sidestep laterally instead of backing straight away when Bandage Toss is available. If it misses, turn on Frost Shot and punish him until he retreats or has to ult defensively. Keep Enchanted Crystal Arrow for interrupting his re-engage or finishing him after Tantrum mitigation is no longer enough.
Later Amumu is rarely a side-lane duelist into Ashe, but his teamfight engage is far more dangerous than his 1v1. Ashe should avoid clumping in Curse of the Sad Mummy range and use Arrow to start fights before Amumu gets the perfect bandage.
- Minions can block Bandage Toss; fight near them when possible.
- Do not walk into Despair range just to keep one extra auto going.
- If Bandage Toss is down, Amumu has no reliable way to stay on Ashe.
- Respect Flash into Curse of the Sad Mummy even when Bandage Toss misses.
Buy
AniviaEven
Ashe can outrange and punish Anivia's slow casts, but Anivia wins if Flash Frost or Crystallize traps Ashe inside Frostbite and Glacial Storm range.
Watch for Flash Frost: it stuns Ashe long enough for chilled Frostbite damage and lets Anivia control the rest of the trade.
How to beat
Fight at max range and move sideways whenever Anivia winds up Flash Frost. Do not commit through Crystallize unless you know you can Arrow her or kill the egg afterward. If Flash Frost misses, Ashe can use Frost Shot to keep Anivia from resetting the spacing.
Later Anivia controls grouped fights and terrain better, while Ashe is better at starting fights from long range. In side lane, Ashe can pressure if she has room to kite, but she must not fight in narrow jungle paths where wall guarantees the spell chain.
- Save enough damage for Rebirth; killing Anivia once is not the end of the duel.
- Do not chase through Glacial Storm unless Flash Frost is down.
- Crystallize is most dangerous near walls, ramps, and jungle entrances.
- Arrow can force Rebirth before Anivia has time to place a good wall.
Buy
AnnieUnfavoured
Annie's longer auto range and instant Pyromania stun make the duel dangerous because Ashe cannot reliably kite once Tibbers lands.
Watch for Pyromania Tibbers: the instant area stun gives Annie her full burst before Ashe can answer with spacing.
How to beat
Track Annie's stun stacks and do not trade when Pyromania is ready. Poke with Volley from outside her engage pattern and only commit after she spends stun on a minion, shield setup, or misses a burst window. If she Flash-Tibbers, use Quicksilver Sash or Arrow immediately after the stun ends to create distance.
Later Annie remains a major threat to Ashe in teamfights because her flash engage is faster than Ashe's normal kiting plan. Ashe should play behind vision and frontline, using Arrow to catch Annie before she reaches stun range.
- Count Pyromania; four stacks changes the whole matchup.
- Do not auto into Molten Shield for free return damage unless you are already all-in.
- Annie's 625 attack range means she can tag Ashe before Ashe tags her.
- Arrow is better as preemptive engage than as a reaction to Tibbers burst.
Buy
BlitzcrankFavoured
Ashe wins if Rocket Grab misses, but instantly loses the spacing battle if Blitzcrank pulls her into Power Fist and Static Field.
Watch for Rocket Grab: it drags Ashe into melee range and gives Blitzcrank the knockup chain he otherwise cannot reach.
How to beat
Stand behind minions and punish every missed Rocket Grab with Frost Shot autos. Keep enough distance that Overdrive alone does not force Power Fist, and use Volley to slow him after he speeds up. Commit only when Rocket Grab is down and Mana Barrier has either been baited or can be burned through safely.
Later Blitzcrank is not a side-lane answer to Ashe unless he lands hook from fog. In teamfights, Ashe must respect hook angles and can use Arrow to punish Blitzcrank after he misses or overextends.
- Do not duel in open river with no minions between you and Rocket Grab.
- Mana Barrier can make the last part of the duel take longer than expected.
- Volley after Overdrive starts makes it harder for him to walk into Power Fist.
- If Rocket Grab is down, Ashe should immediately take space forward.
Buy
BrandUnfavoured
Brand's spell damage and Blaze punish Ashe's low mobility, and a single Sear stun or Pillar hit can decide the duel before she can lifesteal through it.
Watch for Sear: when Ashe is ablaze, it stuns her and guarantees Brand's follow-up damage.
How to beat
Stay at the edge of 600 range and avoid standing in minions that let Brand spread Conflagration pressure. If he misses Pillar of Flame or Sear, use Frost Shot to take a short punish trade rather than a full chase through Blaze damage. Enchanted Crystal Arrow is your best commit tool once Sear is down.
Later Brand is more dangerous in grouped fights because Pyroclasm and area damage punish clumps, but Ashe has the cleaner long-range engage. In side lane, Ashe can win only by dodging the stun setup and forcing him to fight while spells are down.
- If Blaze is on you, sidestep Sear before attacking again.
- Do not stand near minions when Pyroclasm is available.
- Pillar of Flame's delay is your main punish window.
- Arrow after Sear misses can turn the matchup before Brand reloads.
Buy
Cho'GathEven
Ashe can kite Cho'Gath indefinitely in open space, but one Rupture into Feral Scream and Feast can end the duel.
Watch for Rupture: it knocks Ashe up and slows her, letting Cho'Gath walk into silence and Feast range.
How to beat
Fight in open lane, never in narrow jungle paths where Rupture is easy to place. Bait Rupture with small forward steps, then punish with Frost Shot while it is down. Do not commit into Feast range unless Enchanted Crystal Arrow is ready or you already have lethal.
Later Cho'Gath becomes much harder to kill in side lane once he has Feast stacks and defensive items, but he still struggles to reach Ashe without landing Rupture. In teamfights, Ashe should hit safer targets unless Cho'Gath has overused his crowd control, then use slows to keep him away from carries.
- Feral Scream can stop Arrow if he is already close enough to silence you.
- Do not kite backward in a straight line after he aims Rupture behind you.
- Feast range is the danger line; leave before you are low enough to execute.
- Madred's Bloodrazor is specifically valuable when Cho'Gath is stacking health.
Buy

CorkiUnfavoured
Corki wins many equal duels because Phosphorus Bomb, Gatling Gun armor shred, and true-damage autos outtrade Ashe's simpler sustained damage.
Watch for Gatling Gun: it shreds Ashe's armor while Corki keeps autoing, turning the all-in heavily in his favor.
How to beat
Use Ashe's 600 range to poke before Corki can answer with his 550 range and do not stand in Gatling Gun's cone. If Valkyrie is available, avoid committing Arrow until he uses it or is forced into a predictable escape path. Short trades after Volley are safer than standing still in his full damage rotation.
Later Corki remains the stronger isolated marksman duel if he gets to use his full kit, while Ashe brings stronger hard engage for teamfights. Ashe should avoid side-lane 1v1s unless Arrow is up and Corki's Valkyrie is down.
- Step sideways out of Gatling Gun instead of kiting straight away in its cone.
- Do not Arrow before Valkyrie unless Corki has no room to dodge or escape.
- Phosphorus Bomb can reveal and punish brush jukes.
- Your range edge matters most before Corki closes with Valkyrie.
Buy
Dr. MundoEven
Ashe can kite Dr. Mundo with Frost Shot, but Infected Cleaver and Sadism let him survive long enough to force repeated slows and health trades.
Watch for Infected Cleaver: it slows Ashe from range and gives Mundo the chance to walk through Frost Shot spacing.
How to beat
Keep minions between you and Mundo so Cleaver cannot start the chase for free. If he activates Sadism, either apply Grievous Wounds or disengage until the healing window is mostly gone. Commit when Cleaver misses and he has no ultimate regeneration to absorb your sustained damage.
Later Mundo usually outlasts Ashe in side lane if she lacks anti-heal or percent-health damage, but Ashe is better used in grouped fights where her team can help burn him down. Arrow should be saved for his backline or to stop Mundo from reaching Ashe after Cleaver lands.
- Executioner's Calling is the clean answer to Sadism healing.
- Madred's Bloodrazor matters more as Mundo stacks health.
- Do not chase through repeated Cleavers during Sadism.
- A missed Cleaver is the only reliable window to walk forward.
Buy

EvelynnUnfavoured
Evelynn's Camouflage lets her choose the start of the fight, and Ashe struggles once Ravage and Agony's Embrace put Evelynn in melee range.
Watch for Shadow Walk: it lets Evelynn enter the duel from an unseen angle and deny Ashe's normal range setup.
How to beat
Do not take isolated paths without vision, because the matchup changes completely if Ashe sees Evelynn first. If Evelynn opens from stealth, fire Volley and retreat before committing Arrow, since she may still have Agony's Embrace to slow your escape. If you reveal her early, Frost Shot can kite her before she reaches Ravage range.
Later Evelynn wins most isolated catches, while Ashe is stronger in structured teamfights with vision and peel. Ashe should group, ward flanks, and use Arrow once Evelynn commits rather than trying to hunt her alone.
- Sightstone-style warding is a real combat item against Evelynn's approach angles.
- Do not face-check brush when Shadow Walk could already be active.
- Arrow is best after Evelynn reveals, not into fog hoping she is there.
- If Agony's Embrace slows you, stop chasing and create space immediately.
Buy


EzrealEven
Ashe has better reliable autos and engage, but Ezreal can win if Mystic Shot poke and Arcane Shift deny her all-in.
Watch for Arcane Shift: it dodges Ashe's commit and resets the spacing after she turns on Frost Shot.
How to beat
Stand behind minions to reduce Mystic Shot uptime and use your 600 range to force autos when Ezreal steps up. Do not Arrow while Arcane Shift is available unless he is trapped or casting Trueshot Barrage. Once Arcane Shift is down, Frost Shot gives Ashe the stronger chase.
Later Ezreal is safer in side lanes because Arcane Shift makes him harder to catch, but Ashe has the more decisive teamfight initiation. Ashe should force grouped picks with Arrow and avoid long poke standoffs where Mystic Shot stacks his passive for free.
- Minions blocking Mystic Shot also slow Ezreal's cooldown cycle.
- Essence Flux reduces attack speed, so do not force the all-in after it lands cleanly.
- Arrow during Trueshot Barrage's channel is a strong punish.
- If Arcane Shift is down, Ezreal cannot easily escape Frost Shot.
Buy
FiddlesticksUnfavoured
Fiddlesticks wins if he gets Terrify into Drain or Crowstorm, but Ashe can punish him hard when fear is down and she has room to kite.
Watch for Terrify: it removes Ashe's control of spacing and lets Fiddlesticks channel Drain or keep her inside Crowstorm.
How to beat
Stay outside Terrify range and use Volley or autos to interrupt his approach before committing. If he uses Drain, break range or stop it with Enchanted Crystal Arrow rather than trading into the heal. Never duel near fog where Crowstorm can start on top of you.
Later Fiddlesticks is much more threatening from fog in teamfights than in a clean visible duel. Ashe should keep defensive vision, hold Arrow for Crowstorm channels, and avoid side-lane paths where fear into ultimate is unavoidable.
- Arrow cancels Drain and can stop Crowstorm follow-up after he appears.
- Do not stand near minions if Dark Wind can bounce silence onto you.
- Mercury's Treads or QSS changes whether Terrify guarantees the fight.
- If Terrify is down, Fiddlesticks is very punishable at Ashe's range.
Buy
GangplankEven
Ashe can kite Gangplank in extended space, but Parrrley poke and Remove Scurvy cleansing her Arrow make committing unreliable.
Watch for Remove Scurvy: it clears Enchanted Crystal Arrow or Frost Shot slow and heals through Ashe's engage window.
How to beat
Use Frost Shot autos to pressure him before he can chain Parrrley trades, but do not rely on Arrow as your first crowd control while Remove Scurvy is ready. Bait the cleanse with slows or a shorter trade, then commit after it is down. Keep moving out of Cannon Barrage instead of trying to finish the duel inside it.
Later Gangplank can become a dangerous side-lane threat with crit and global pressure, while Ashe is usually stronger as a direct teamfight starter. Ashe should force fights when Remove Scurvy is unavailable or aim Arrow at targets who cannot cleanse it.
- Do not spend Arrow into Remove Scurvy unless you only need the cleanse forced.
- Cannon Barrage can turn a winning chase into a losing slow field.
- Parrrley lets Gangplank trade without entering your auto range for long.
- If Remove Scurvy is down, Frost Shot makes the lane-length chase favor Ashe.
Buy
GarenFavoured
Ashe wins in open space because Frost Shot keeps Garen from sticking, but she loses if Decisive Strike reaches silence range before she creates distance.
Watch for Decisive Strike: it breaks slows, speeds Garen up, and silences Ashe long enough for Judgment and Demacian Justice pressure.
How to beat
Keep Garen at max range and start backing up as soon as Decisive Strike is activated. After the speed burst and slow cleanse are gone, Frost Shot makes him easy to punish. Do not fight low health near him, because Demacian Justice turns a small mistake into an execute.
Later Garen is still kiteable in side lane if Ashe has space, but brush, fog, and flank angles let him force the silence. In teamfights, Ashe should not waste too much damage into Courage and should use slows to peel him off carries.
- Decisive Strike cleanses slows, so wait to reapply Frost Shot after he uses it.
- Do not stand near brush where Garen can start inside silence range.
- Back off during Courage if you cannot kite freely.
- Demacian Justice means you must leave earlier than against most tanks.
Buy
GragasUnfavoured
Gragas wins if he reaches spell range because Barrel Roll and Body Slam break Ashe's spacing before Explosive Cask finishes the duel.
Watch for Body Slam closes the gap and slows you, taking away the kite window Ashe needs to keep firing.
How to beat
Hold just outside Body Slam range and make Gragas spend it sideways or into minions before you commit with Frost Shot. If he misses E, chase with Volley and autos; if he still has Explosive Cask, keep enough angle that it cannot knock you back into him.
Later Gragas is still favored in a side-lane pick if he has fog or Flash, but Ashe is more valuable in grouped fights when she can start with Enchanted Crystal Arrow from outside his combo range. Buy magic resistance if his burst is the reason you cannot stand in fights.
- Do not stand near your caster minions when Barrel Roll is placed; the attack speed slow ruins your return trade.
- If Body Slam is down, Gragas has to walk through Frost Shot to finish you.
- Save Arrow for after he uses Body Slam unless you need it to interrupt an all-in immediately.
Buy

HeimerdingerEven
Ashe can outrange Heimerdinger himself, but his turret field and grenade punish any duel taken on his setup.
Watch for CH-1 Concussion Grenade stuns or blinds you, either locking you in turret damage or making your auto attacks miss during your best trade window.
How to beat
Do not fight inside multiple H-28G Evolution Turrets; clear or pull away from the nest first. Hold 600 range on Heimerdinger and punish him after grenade misses, using Volley to tag him without walking into rockets and turret focus.
Later Heimerdinger is stronger around prepared zones and sieges, while Ashe is stronger at starting fights before his turrets matter. In side lane, only challenge him when the wave is moving away from his setup.
- Volley can hit Heimerdinger while you stay outside most turret focus if he is standing behind the line.
- Back off immediately when grenade is available and you are near his turrets.
- Hawkshot is useful for checking brush nests before you walk into rocket range.
Buy
JannaFavoured
Janna can disengage Ashe but usually cannot kill her alone, so Ashe wins the duel if she respects the knockback and keeps autoing.
Watch for Monsoon knocks you away and resets the fight, denying the final few Frost Shot attacks.
How to beat
Walk her down with Frost Shot, but do not spend Enchanted Crystal Arrow until Eye Of The Storm is weakened or Monsoon is forced. Sidestep charged Howling Gale rather than chasing in a straight line, then re-enter at 600 range where she cannot trade enough damage back.
Later Janna is not a side-lane threat; she wins by protecting carries in teamfights and ruining Ashe's engage. Use Arrow on targets outside Janna's immediate peel range or wait until Monsoon is down.
- Do not Arrow into a fresh Eye Of The Storm unless your team can follow instantly.
- A short, uncharged Howling Gale is her only fast interruption before Monsoon.
- If she uses Zephyr aggressively, her passive movement drops and Frost Shot sticks better.
Jarvan IVUnfavoured
Jarvan IV's gap close and Cataclysm force Ashe into a trapped melee duel she usually cannot survive.
Watch for Cataclysm traps Ashe in terrain, removing her ability to kite unless she has Flash or immediate peel.
How to beat
Stay beyond Demacian Standard plus Dragon Strike range and punish Jarvan only after the flag combo is down. If he enters with Cataclysm, fire Enchanted Crystal Arrow point blank and use the stun duration to create distance or finish him before Martial Cadence and armor shred kill you.
Later Jarvan remains much stronger in isolated side-lane engages, while Ashe is better grouped where allies can break or punish his dive. Guardian Angel can be worth it when his job is to spend everything locking you in place.
- Do not stand near his Demacian Standard; Dragon Strike from the flag is the real engage.
- Frost Shot matters only after his dash is spent.
- If he misses the flag combo, he is kiteable until Cataclysm comes back into range.
Buy
JaxUnfavoured
Jax beats Ashe once Leap Strike and Counter Strike connect because he denies her auto attacks and wins the extended melee fight.
Watch for Counter Strike dodges Ashe's basic attacks, wasting her main damage and setting up the stun that lets Jax stay on top of her.
How to beat
Do not auto into Counter Strike if you can kite backward and wait out the dodge. Keep Frost Shot active before he commits, use Volley as he starts running in, and save Enchanted Crystal Arrow for after Leap Strike or Counter Strike so the stun actually creates distance.
Later Jax destroys Ashe in the side lane and becomes harder to peel as items finish. Ashe should avoid matching him alone and play grouped, where Arrow and slows can help the team kill him after Counter Strike expires.
- If Jax starts Counter Strike before Leap Strike, walk away instead of trading autos.
- Arrow during Counter Strike is still useful for spacing, but your follow-up damage is poor until the dodge ends.
- Do not let him stack Grandmaster's Might on minions before the duel starts.
Buy
KarthusFavoured
Ashe outranges and out-DPSes Karthus in a clean duel as long as she keeps moving between attacks and saves enough health for Death Defied and Requiem.
Watch for Wall of Pain slows and shreds resistances, making it much easier for Lay Waste and Defile to finish you.
How to beat
Fight at max auto range and move after every attack so isolated Lay Waste does not land for free. If Wall of Pain hits, step out before committing; once Karthus is low, be ready to leave Death Defied range instead of standing still to finish extra autos.
Later Karthus is far more dangerous in teamfights than in a side duel because Death Defied and Requiem punish grouped low-health enemies. Ashe should start fights from range and avoid trading her life for his unless Requiem cannot clean up afterward.
- Do not chase through Wall of Pain; it turns easy kiting into a spell DPS race.
- After killing him, leave Defile range immediately before considering the next target.
- Keep enough health for Requiem if his ultimate is available.
Buy
KassadinUnfavoured
Kassadin can repeatedly Riftwalk past Ashe's 600 range and silence her before she can use Arrow or Volley cleanly.
Watch for Riftwalk lets Kassadin ignore Frost Shot spacing and appear on top of you for repeated burst.
How to beat
Abuse him before level 6, when he has to walk through autos to trade. After Riftwalk, hold Arrow until he jumps in or uses Null Sphere, because firing it while he can still blink is unreliable; if he stacks Riftwalk damage, disengage until the mana cost forces him to stop.
Later Kassadin is heavily favored in side lanes and pick situations, while Ashe must play with vision and teammates to punish his entry timing. Magic resistance and a spell shield can buy the half-second needed to Arrow or Flash after his first jump.
- Do not cast Arrow from long range at a Kassadin with Riftwalk ready.
- Null Sphere silence can deny your immediate response, so pre-position before he enters Q range.
- His repeated jumps are much worse if you make him spend them crossing open ground under Frost Shot.
Buy
KatarinaEven
Ashe wins if she interrupts Death Lotus and keeps distance, but Katarina can kill her quickly if Shunpo gets a clean reset angle.
Watch for Death Lotus deals the lethal damage if Ashe has already spent Enchanted Crystal Arrow or is too close to leave its radius.
How to beat
Stay at max attack range and force Katarina to use Shunpo just to reach you, not to dodge Arrow. Save Enchanted Crystal Arrow for Death Lotus or for the moment after Shunpo, then kite with Frost Shot while her main cooldowns are down.
Later Katarina is better at cleaning chaotic teamfights, while Ashe is better at starting controlled fights and stopping her channel. In side lane, Ashe can win with Arrow available but should not duel near low-health allies or minions that create reset pressure.
- Never spend Arrow casually while Death Lotus is available.
- If Katarina Shunpos first, she has no instant dodge for your point-blank Arrow.
- Back away from low-health nearby allies; Voracity can turn their death into your death.
Buy
KayleUnfavoured
Kayle matches Ashe's ranged trading during Righteous Fury and can nullify Ashe's kill window with Intervention.
Watch for Intervention makes Kayle immune during Ashe's commit, wasting Enchanted Crystal Arrow follow-up and letting Kayle keep attacking.
How to beat
Do not duel while Righteous Fury and Intervention are both available unless Kayle is already chunked. Bait Reckoning or Righteous Fury, kite back until the ranged window shortens, then re-engage with Frost Shot; if she ults, stop committing cooldowns and resume when immunity ends.
Later Kayle scales into a stronger direct duel and can protect the most important target in teamfights. Ashe should use Arrow to force Intervention early, then let the team re-engage after it expires rather than trying to solo through it.
- Her Reckoning slow can flip the chase, so do not overextend just because Frost Shot is active.
- If Intervention is down, Arrow gives Ashe a real kill window.
- Fight away from waves when possible; Righteous Fury splash makes standing near minions worse.
Buy
KennenUnfavoured
Kennen's mobility and stun stacks let him close the gap and burst Ashe before she can win a pure ranged DPS fight.
Watch for Slicing Maelstrom adds repeated Mark of the Storm stacks, stunning Ashe if she stays close and letting Kennen finish the all-in.
How to beat
Hold 600 range and avoid giving him a free first Mark from Thundering Shuriken or empowered Electrical Surge. If Lightning Rush is used forward, kite immediately and Arrow him before Slicing Maelstrom stacks multiple stuns; if his ultimate is down, Ashe can chase him with Frost Shot.
Later Kennen is stronger in flank teamfights and isolated all-ins, while Ashe is stronger when she sees him early and starts from long range. Magic resistance or a cleanse effect is valuable if his stun chain is the reason fights are lost.
- Track his empowered W auto; one mark makes the next stun much easier.
- Do not chase into Slicing Maelstrom radius unless Arrow will end the fight instantly.
- Hawkshot flank brushes before objectives so he cannot start the duel from melee range.
Buy
Kog'MawUnfavoured
Kog'Maw wins equal-item ranged duels when Bio-Arcane Barrage is active because he outranges Ashe and deals percent-health damage.
Watch for Bio-Arcane Barrage extends Kog'Maw's range beyond Ashe's and turns the trade into one Ashe cannot answer directly.
How to beat
Do not trade autos during Bio-Arcane Barrage unless you are already committing with Enchanted Crystal Arrow. Wait out W, dodge Void Ooze so you can close the gap afterward, then use Frost Shot to keep him inside Ashe's 600 range while his range steroid is down.
Later Kog'Maw outscales Ashe in straight front-to-back damage, but Ashe has the stronger initiation tool. In teamfights, Arrow him or his peel before Bio-Arcane Barrage free-fires; in side lane, avoid dueling him with W active.
- His base range is shorter than yours; punish him before Bio-Arcane Barrage is active.
- Do not stand in Void Ooze while chasing, or he gets enough space to turn.
- After killing him, move away from Icathian Surprise instead of taking the explosion for one more attack.
Buy
Lee SinUnfavoured
Lee Sin wins if Sonic Wave lands because Resonating Strike and Dragon's Rage force Ashe into melee where she cannot kite.
Watch for Sonic Wave / Resonating Strike marks Ashe and gives Lee Sin the guaranteed gap close that starts his kill combo.
How to beat
Keep minions between you and Sonic Wave and punish Lee whenever Q is down. If he lands Q, save Enchanted Crystal Arrow for his follow-up dash or after Dragon's Rage, then Frost Shot kite while Safeguard is unavailable.
Later Lee Sin is less reliable in full teamfights but still dangerous as a pick threat onto Ashe. Group behind minions and teammates, and consider armor or Guardian Angel if he is spending every fight to kick you out of position.
- A missed Sonic Wave is your clearest window to walk forward and trade.
- Do not Arrow before he takes Resonating Strike unless you are certain it will hit through minions.
- Hawkshot common flank paths; Lee is much scarier when Q starts from fog.
Buy
LeonaEven
Leona cannot usually kill Ashe alone without follow-up damage, but if Zenith Blade lands she can lock Ashe down long enough to win a close duel.
Watch for Zenith Blade pulls Leona to you, starting the stun chain that removes Ashe's spacing.
How to beat
Stay behind minions or outside Zenith Blade line and poke when Eclipse is not active. If she misses E, Frost Shot lets you kite her forever; if she lands it, Arrow after Shield of Daybreak or Solar Flare to stop the second half of the chase.
Later Leona is not a side-lane carry threat, but she is much more relevant in teamfights where allies can trigger Sunlight and follow her lockdown. Ashe should respect her engage range and use Arrow either to start before Leona does or to peel the enemy carry she enables.
- Do not waste damage into Eclipse unless you are only trying to force it out.
- A missed Zenith Blade turns the matchup from dangerous to free for several seconds.
- Mercury's Treads are useful only if her crowd control chain is deciding fights.
Buy
LuluEven
Lulu's shields, slows, and Wild Growth can deny Ashe's all-in, but Ashe has the range and sustained damage to win if she waits out the defensive cooldowns.
Watch for Wild Growth knocks Ashe up if she is too close and adds enough health to erase her Arrow commit.
How to beat
Trade from 600 range and do not hard commit into Help, Pix! plus Wild Growth. Bait Glitterlance first, then chase with Frost Shot when Lulu cannot slow you; save Arrow for after Wild Growth or to stop her from walking out once it is down.
Later Lulu is rarely looking for a side-lane duel; her value is making another carry survive Ashe's engage. Ashe should pressure from range and avoid spending Arrow on a target Lulu can instantly save unless the team can continue after Wild Growth.
- Pix bolts make short trades worse than they look, so avoid standing still in her auto range.
- If Glitterlance misses, Lulu has a hard time escaping Frost Shot without using Whimsy defensively.
- Do not stand in Wild Growth knockup range when finishing her.
Buy
LuxEven
Lux wins by landing Light Binding into her full combo, while Ashe wins if she dodges the root and forces a sustained auto-attack chase.
Watch for Light Binding roots Ashe, guaranteeing Lucent Singularity and setting up Finales Funkeln before Ashe can kite.
How to beat
Hold max range and move laterally so Light Binding has to be aimed through open space rather than thrown down a straight chase line. Once Q misses, walk forward with Frost Shot and Volley; keep Arrow for the punish or to interrupt her attempt to reset distance.
Later Lux is stronger at long-range picks and wave control, while Ashe is stronger at reliable initiation and sustained front-to-back damage. In side lane, the duel is Ashe-favored only after Light Binding is down; in teamfights, avoid being the rooted target that starts her combo.
- Do not chase through Lucent Singularity's slow while Light Binding is still ready.
- Prismatic Barrier can make your first few autos misleading; keep counting her real health after the shield fades.
- Arrow is easiest to land after she stops to cast Finales Funkeln or E.
Buy
MalphiteUnfavoured
Malphite's armor, attack speed slow, and Unstoppable Force make him a brutal 1v1 for Ashe once he reaches engage range.
Watch for Ground Slam reduces Ashe's attack speed, cutting her main damage source right when Malphite is in melee.
How to beat
Do not let Granite Shield refresh for free before trading; chip it with Volley, then back up. Stay outside Unstoppable Force range whenever possible, and if he uses it, Arrow immediately after the knockup ends to create enough time for Frost Shot kiting.
Later Malphite remains favored in side-lane catches and is one of the cleanest teamfight answers to Ashe. Ashe should play behind vision, save Flash for Unstoppable Force angles, and consider defensive items when his engage is aimed only at her.
- Break Granite Shield before committing serious cooldowns.
- If Seismic Shard lands, stop chasing; the stolen movement speed lets him set up ultimate.
- Ground Slam after his engage means your lifesteal and DPS timing are worse than expected.
Buy
MalzaharUnfavoured
Malzahar wins if he ever gets in range for Nether Grasp, because Ashe has no built-in way to break the suppress or fight through the full spell chain.
Watch for Nether Grasp suppresses Ashe long enough for Null Zone and Malefic Visions to do the duel's lethal damage.
How to beat
Hold beyond 550 range and make Malzahar spend Call of the Void or Malefic Visions before you walk up for autos. Save Enchanted Crystal Arrow for his commit or to interrupt his approach before Nether Grasp range. If you buy cleanse, you can take the fight after he uses ultimate; without it, do not start a close-range duel.
Later Malzahar still controls the side lane better if Ashe lacks Quicksilver Sash, but Ashe is much more valuable front-to-back if she can avoid or cleanse Nether Grasp. In teamfights, stand outside flash-suppress range and use Crystal Arrow on him before he locks someone down.
- Quicksilver Sash is the matchup-changing purchase because it removes Nether Grasp.
- Do not chase a low Malzahar through Null Zone; the channel punish is waiting at 550 range.
- Voidling adds real damage if you stand still during his combo, so kite sideways after the cleanse or stun.
Buy
Master YiUnfavoured
Master Yi's Highlander ignores Frost Shot, so Ashe loses the duel once he reaches melee range unless she lands Crystal Arrow before his reset window.
Watch for Highlander makes Yi immune to Ashe's slow plan and gives him the movement speed to stay on her.
How to beat
Keep max auto range and do not use Volley as your only spacing tool once Highlander is available. Bait Alpha Strike with a short step forward, then fire Enchanted Crystal Arrow as he appears and kite away during the stun. If Highlander is already running and Arrow misses, disengage rather than trying to race his DPS.
Later Yi is the stronger side-lane duelist and can run Ashe down in long space. Ashe's late-game job is teamfight control: hold Arrow for Yi's entry and force him to cross allied crowd control instead of giving him an isolated reset.
- Frost Shot stops mattering during Highlander, so judge the fight around Arrow, not slow uptime.
- Do not Arrow while Yi is untargetable in Alpha Strike; wait for him to reappear.
- If Yi uses Meditate early, keep distance and restart the fight after it ends rather than feeding his low-health attack speed.
Buy

Miss FortuneEven
Ashe has longer range and better single-target control, but Miss Fortune has stronger short trades and can punish bad positioning with Double Up and Bullet Time.
Watch for Bullet Time forces Ashe to either interrupt with Enchanted Crystal Arrow or leave the cone immediately.
How to beat
Play at 600 range and avoid lining up behind minions where Double Up can bounce into you. Trade after Miss Fortune spends Make It Rain or Double Up, then keep Frost Shot active so Strut never turns back on. Save Crystal Arrow to cancel Bullet Time unless you are using it to start a guaranteed kill.
Later Ashe is usually safer in full teamfights because her engage is instant and global, while Miss Fortune can deal more damage if Bullet Time is protected. In side lane, the duel remains playable for Ashe if she denies Strut and does not eat a full ultimate.
- A single Volley tag removes Strut and makes the next few autos much easier to force.
- Stand off the minion line so Double Up cannot turn a losing trade into a crit punish.
- Crystal Arrow cleanly stops Bullet Time; do not spend it casually if her ultimate is ready.
Buy
MorganaEven
Morgana can win with Dark Binding into Soul Shackles, but Ashe wins open space trades if she baits Black Shield and keeps moving.
Watch for Dark Binding takes away Ashe's spacing and lets Morgana place Tormented Soil plus Soul Shackles.
How to beat
Stay outside binding angles and use minions to block Dark Binding before committing autos. Force Black Shield with Volley or the threat of Crystal Arrow, then wait it out and re-engage when it drops. If she walks into Soul Shackles range without Binding, kite backward and stun her before the second hit.
Later Morgana is more valuable as anti-engage and pick protection, while Ashe brings the cleaner fight starter if Black Shield is down. In side lane, Ashe can pressure her from range but should not chase through fog or binding corridors.
- Black Shield blocks Crystal Arrow's stun, so do not fire Arrow into an obvious shield unless breaking it is guaranteed.
- Move sideways after every auto; Morgana needs a binding line more than she needs raw range.
- If Soul Shackles starts, immediately kite out of tether range rather than finishing one more attack.
Buy
NasusUnfavoured
Ashe can kite early, but Wither removes her movement and attack speed so Nasus eventually reaches her and wins extended duels.
Watch for Wither cripples both Ashe's movement and attack speed, turning her spacing advantage into a losing melee fight.
How to beat
Fight only while Wither is down or when you have enough distance to absorb its ramp-up. Hold 600 range, use Volley to keep him slowed before he casts Wither, and save Crystal Arrow for the moment he closes with Fury of the Sands running. If Wither lands in open ground, retreat first and resume damage after it expires.
Later Nasus becomes the better side-lane champion and Ashe should not answer him alone unless massively ahead or under turret. In teamfights, Ashe kites front-to-back and uses Arrow to stop Nasus from walking past the frontline.
- Boots of Swiftness are valuable because Wither is the duel, not Siphoning Strike alone.
- Do not stand in Spirit Fire while trading; the armor reduction makes his next Q much worse.
- Crystal Arrow is best after Wither starts, buying time while the slow ramps down.
Buy
NidaleeEven
The duel hinges on spear avoidance: Ashe wins steady ranged combat, but Nidalee wins hard after a long-range Javelin Toss or trap debuff.
Watch for Javelin Toss can remove enough health from long range that Nidalee's cougar follow-up becomes lethal.
How to beat
Stay behind minions and keep lateral movement constant so Javelin Toss cannot open the fight. If Nidalee misses spear or uses Primal Surge defensively, step forward with Frost Shot and force autos before she can reset through brush. Do not chase through Bushwhack paths or brush where Prowl lets her choose the re-engage.
Later Nidalee is better at poke and split pressure, while Ashe is better at decisive teamfight engage. Late side-lane duels stay volatile: Ashe wins if spear misses, Nidalee wins if she lands poke before cougar form.
- A trap's resistance shred makes even a normal spear trade dangerous; back off until it expires.
- Volley is useful for checking brush before Nidalee uses Prowl to reset spacing.
- Crystal Arrow is strongest after she commits cougar form, when she cannot answer from long range.
Buy
Nunu & WillumpFavoured
Nunu cannot reliably force a kill through Ashe's range unless Ice Blast repeatedly lets him walk into Absolute Zero range.
Watch for Ice Blast slows Ashe's movement and attack speed, giving Nunu the only realistic way to close distance.
How to beat
Stay at max range and trade only one or two autos after Ice Blast, then reset before he can chain slows. If he channels Absolute Zero, leave the circle or stop it with Enchanted Crystal Arrow. Do not waste damage into Consume sustain around minions unless you are already committing for the kill.
Later Nunu is not a serious side-lane duelist into Ashe unless she is trapped in short space, but he amplifies a teammate better than he fights alone. In teamfights, Ashe should watch for Absolute Zero channels and use Arrow or Volley spacing to keep him from zoning the backline.
- Ice Blast lowers attack speed, so short trades beat standing still and trying to drain him down.
- Crystal Arrow cancels Absolute Zero and is often worth holding for that channel.
- Fight away from minion waves if possible so Consume cannot pad the duel.
Buy
OlafUnfavoured
Olaf's Ragnarok ignores Ashe's crowd control and Undertow lets him keep the chase going until Reckless Swing finishes her.
Watch for Ragnarok removes Ashe's slows and stun as reliable peel during his all-in.
How to beat
Poke before Olaf commits and make him spend Undertow from too far away, then punish while he has to retrieve the axe. Never rely on Crystal Arrow after Ragnarok is active; either stun him before he ults or use it after the duration ends. If he lands the first axe and has space to chase, give ground immediately instead of taking a DPS race.
Later Olaf is the stronger isolated side-lane threat because he can ignore Ashe's control during the all-in. Ashe contributes more in grouped fights by forcing Olaf to run through teammates and saving movement for after Ragnarok expires.
- Sidestep Undertow first; if it hits, the rest of the duel is on Olaf's terms.
- Do not get baited by low-health Olaf, because Berserker Rage and Vicious Strikes make him stronger there.
- Crystal Arrow before Ragnarok can force his ultimate defensively instead of offensively.
Buy
PantheonUnfavoured
Pantheon's point-and-click stun and early burst beat Ashe before she can use range for a long enough trade.
Watch for Aegis of Zeonia jumps onto Ashe and stuns her, guaranteeing Heartseeker Strike damage.
How to beat
Hold outside Aegis of Zeonia range and make Pantheon spend Spear Shot into short trades rather than giving him the jump. Break Aegis Protection with Volley or a light auto before committing your stronger shots. If he leaps, fire Crystal Arrow as soon as the stun ends and kite out before the next Spear Shot.
Later Ashe scales into better teamfight utility, but Pantheon still wins many side-lane duels if he gets the first stun. Grouped, Ashe should track Grand Skyfall angles and punish Pantheon after his burst is spent.
- Do not open with your biggest auto into Aegis Protection; remove the block first.
- Standing just inside Spear Shot range but outside jump range lets you bait his lower-commitment damage.
- Armor is more valuable than health if his combo is the problem.
Buy

RammusUnfavoured
Rammus is built to punish basic attackers, and Taunt plus Defensive Ball Curl makes Ashe damage herself while losing control of the fight.
Watch for Puncturing Taunt forces Ashe to attack into Defensive Ball Curl and removes her kiting window.
How to beat
Keep distance from Powerball paths and do not attack into Defensive Ball Curl unless you are safely outside Taunt range. Use Crystal Arrow to stop Powerball or to disengage after Taunt ends, not to start a duel into his defenses. If he has Flash or brush access, treat the fight as unsafe until Taunt is down.
Later Rammus is much better at catching Ashe than dueling cleanly, and Ashe should not side-lane near him without vision. In teamfights, wait out Defensive Ball Curl when possible and rely on teammates' magic damage or armor shred while you keep maximum spacing.
- Stop attacking during Defensive Ball Curl if Taunt is not forcing you to hit him.
- Crystal Arrow can interrupt Powerball before he reaches Taunt range.
- Quicksilver Sash removes Taunt and is the cleanest way to restore spacing.
Buy
RyzeUnfavoured
Ryze's targeted Rune Prison lets him force his spell rotation inside Ashe's range, where her kiting advantage matters much less.
Watch for Rune Prison roots Ashe in range for Overload, Spell Flux, and Desperate Power damage.
How to beat
Play at the edge of 600 range and punish Ryze before he can step into 550 for Rune Prison. If Rune Prison is used on a minion wave trade or missed timing, commit with Frost Shot and keep him from using Desperate Power movement to close again. Save Crystal Arrow either to stop his ultimate chase or to create distance immediately after the root ends.
Later Ryze becomes the more dangerous side-lane duelist because his targeted control and spell vamp favor close fights. Ashe is stronger as long-range initiation in teamfights, but she needs magic resist or cleanse if Ryze can reach her.
- The 50 range difference matters; do not give it up by walking forward after every auto.
- Avoid fighting inside a wave when Spell Flux can bounce and shred magic resist.
- Mercurial Scimitar or QSS turns Rune Prison from a kill setup into a cooldown.
Buy
ShacoUnfavoured
Shaco wins if he starts from invisibility or box control, while Ashe wins only when she sees him early and keeps him in front of her.
Watch for Deceive lets Shaco bypass Ashe's range and open from behind with Backstab damage.
How to beat
Do not take the duel near unwarded brush or Jack In The Box setups. If Shaco appears with Deceive, fire Crystal Arrow after he lands rather than guessing during invisibility, then kite away from boxes and the clone. When Deceive is down and he is visible, Ashe can chase with Frost Shot and force him out.
Later Shaco is far better at isolated picks and side-lane traps, while Ashe is stronger in structured teamfights if she has vision. Group with wards and save Arrow for his reveal or for the real champion after Hallucinate splits the target.
- Volley can reveal his direction after Deceive if it tags him as he exits stealth.
- Do not chase the clone through boxes; make Shaco come through your team instead.
- A ward item matters more than a damage item when the fight starts from fog.
Buy
ShenEven
Ashe can kite Shen in open ground, but Shadow Dash gives him a real punish window if she stands too close or wastes Crystal Arrow.
Watch for Shadow Dash taunts Ashe and lets Shen land Ki Strike while denying her movement.
How to beat
Stay at 600 range and force Shen to use Shadow Dash from max distance, where you can sidestep it. If he misses Dash, chase with Frost Shot and do not let him walk out for free. Save Crystal Arrow for a confirmed stop on his retreat or to interrupt a Stand United channel if the duel turns into a map play.
Later Shen is the better map champion because Stand United changes fights elsewhere, but Ashe can still beat him in a clean open-lane duel with room to kite. In teamfights, Ashe should interrupt Stand United when possible and avoid being taunted into his frontline.
- Sidestepping Shadow Dash is the whole duel; once it misses, Shen has trouble touching you.
- Do not waste Crystal Arrow into Feint unless the stun is needed to stop a channel.
- If Shen starts Stand United nearby, Arrow him instead of hitting the shielded target.
Buy
SingedUnfavoured
Singed wins if he reaches Fling range, and Insanity Potion plus Mega Adhesive makes that much easier than Ashe wants.
Watch for Fling puts Ashe behind Singed into Poison Trail, reversing her kite path and starting his damage loop.
How to beat
Hold max range and never chase Singed through Poison Trail, even when he looks low. Step around Mega Adhesive rather than through it, then punish after Fling is unavailable or he turns away. Use Crystal Arrow defensively when he commits with Insanity Potion, because starting on him rarely kills before he reaches you.
Later Singed is the stronger side-lane nuisance and can force Ashe to overextend if she tries to answer him alone. Ashe should group, use Arrow to start fights away from his split push, and kite him through teammates rather than down a lane by herself.
- If Singed runs away, he is often winning; stop following the Poison Trail.
- Mega Adhesive is more dangerous than its damage suggests because it sets up Fling range.
- Boots of Swiftness help keep Frost Shot spacing through his slows.
Buy
SionUnfavoured
Sion's point-and-click stun and shield burst beat Ashe if he gets close, while Cannibalism can undo long basic-attack trades.
Watch for Cryptic Gaze stuns Ashe long enough for Death's Caress and Enrage attacks to connect.
How to beat
Stay outside Cryptic Gaze range and use Volley to test or break Death's Caress before it detonates. If Sion burns the shield early or misses the window to pop it, kite with Frost Shot and keep him from using Cannibalism autos. Save Crystal Arrow for after he starts walking in, not while he can simply back away and reset the shield.
Later Sion is more threatening in side-lane melee range, especially if he has lifesteal uptime from Cannibalism. Ashe is better in teamfights when she can force him to cross open ground and stun him before he reaches the backline.
- Do not stand near a charged Death's Caress; make him choose between popping it early or losing the shield.
- Executioner's Calling is specifically useful when Cannibalism is carrying the duel.
- A point-blank Crystal Arrow after Cryptic Gaze ends can reset the spacing.
Buy
SivirFavoured
Ashe outranges Sivir heavily and can win the duel if she does not hand Spell Shield her Enchanted Crystal Arrow.
Watch for Spell Shield blocks Crystal Arrow or Volley, denying Ashe's main engage and giving Sivir a free trade window.
How to beat
Abuse 600 range into Sivir's 425 range and keep her slowed before she can use Fleet of Foot to close. Bait Spell Shield with Volley or a paused auto pattern, then fire Crystal Arrow after it drops. Dodge Boomerang Blade sideways; if both passes miss, commit immediately because her range disadvantage is exposed.
Later Sivir brings stronger team movement and wave control, but Ashe remains the better pick champion and wins many direct duels with clean spacing. In teamfights, do not throw Arrow into obvious Spell Shield; aim for another target or wait it out.
- Your range advantage is 175 units, so Sivir should have to spend On The Hunt just to start a real duel.
- Do not stand in the minion wave where Ricochet gives her extra damage while she farms.
- Volley is often the safest way to draw Spell Shield before the real Arrow.
Buy
SkarnerUnfavoured
Ashe can kite Skarner before he reaches her, but Crystalline Exoskeleton plus Impale makes the duel swing hard once he gets into grab range.
Watch for Impale: suppresses Ashe and drags her through Skarner's damage window, removing the spacing she needs to win.
How to beat
Hold maximum 600 range and open with Frost Shot only after Crystalline Exoskeleton is damaged or timed out, because the shield's speed is his real engage. Save Enchanted Crystal Arrow for the moment he commits forward, not for poke. If he ever reaches Impale range while his shield is up, disengage instead of trading.
Later Skarner is stronger in the side lane if he can force a corner or brush fight, while Ashe is much more valuable in teamfights if she stays behind peel. Buy a cleanse effect when his only job is to drag you, and use Hawkshot to avoid face-checking his flank paths.
- Breaking Crystalline Exoskeleton removes both the shield and his speed boost, so Volley is worth using early in the chase.
- Do not Arrow from too close unless Impale is down; he can still suppress you after the stun ends.
- Frost Shot beats Skarner in open ground, not in river bends or jungle choke points.
- If he flashes or sprints forward without W, he is usually fishing only for Impale.
Buy
SonaFavoured
Ashe outranges Sona, wins extended autos, and only has to respect Sona's Crescendo burst setup.
Watch for Crescendo: stuns Ashe long enough for Sona to unload Power Chord and Q-empowered damage before Ashe can kite.
How to beat
Stand just outside Sona's 550 attack range and punish every Hymn of Valor step with an auto plus Volley. Track Power Chord; if it is ready, do not walk into a short trade unless you can immediately answer with Arrow or force her back. Commit after Crescendo is missed or unavailable, because Sona has no real escape from Frost Shot.
Later Ashe still wins the isolated duel, but Sona matters more as a teamfight aura and Crescendo champion than as a side-laner. In fights, spread from allies so one Crescendo does not start the entire engage, then punish her short range after it is used.
- Your 600 range lets you hit Sona without taking her basic attack back if you space cleanly.
- Power Chord after W reduces your damage, so do not all-in through that version unless she is already low.
- Arrowing Sona after she uses Song of Celerity usually guarantees the chase.
- Volley can tag her while she tries to sit behind minions for Q poke.
Buy
SorakaFavoured
Soraka can stall with heals and silence, but Ashe's range and sustained physical damage eventually beat her in a clean duel.
Watch for Infuse: silences Ashe at the start of a trade, stopping Frost Shot toggles, Volley, or Arrow follow-up during the punish window.
How to beat
Keep the fight at auto range and do not waste Enchanted Crystal Arrow while silenced. Force Astral Blessing first with repeated autos and Volley, then commit while its armor buff and heal are unavailable. If Wish is up, expect the duel to take one extra damage cycle rather than ending on the first Arrow.
Later Soraka rarely wants a side-lane duel, and Ashe wins it if she can keep hitting through the heals. In teamfights, Soraka's value is keeping someone else alive, so Ashe should use Arrow to start or interrupt before Wish resets the fight.
- Executioner's Calling is valuable because both Astral Blessing and Wish are the matchup.
- Do not burst into Astral Blessing's armor window if you can simply keep slowing and wait it out.
- Infuse has short range compared to your auto range; make her walk into you for it.
- If Soraka uses Wish early, the rematch is much easier until it returns.
Buy
TaricEven
Ashe wins if she keeps Taric at the edge of her range, but Dazzle into Shatter and Radiance can punish any close approach.
Watch for Dazzle: stuns Ashe from range and gives Taric the only reliable window to walk in and unload melee damage.
How to beat
Play at 600 range and make Taric spend Dazzle before you commit to a long chase. Once Dazzle is down, Frost Shot makes it very hard for him to ever reach melee range. Avoid trading into Shatter's armor aura if you can kite back and let his short cooldown cycle pass.
Later Taric does not usually beat Ashe in open side-lane space, but he can trap her near brush or with teammates nearby. In teamfights, save cleanse or Flash for Dazzle chains and hit the front line until Taric's stun is spent.
- Dazzle hurts more when Taric is close, so back up as the projectile travels instead of standing still.
- Shatter's armor makes short trades worse; longer kiting trades are better for Ashe.
- Arrow after Dazzle misses, not before, because otherwise he can stun you after the Arrow ends.
- Taric's sustain is limited in a pure duel if you deny melee autos.
Buy
TeemoUnfavoured
Teemo's Blind removes Ashe's basic attack damage during the most important part of the trade, and his poison keeps winning short exchanges.
Watch for Blinding Dart: blinds Ashe, causing her autos to miss while Teemo continues applying Toxic Shot damage.
How to beat
Do not start an all-in with basic attacks while Blinding Dart is available; bait it with a short step forward, then back off until the blind ends. Use Volley to trade during the blind because it still lets you deal damage without relying on autos. Commit only after Q is down or after landing Enchanted Crystal Arrow from outside mushroom control.
Later Teemo is annoying in side lanes because Noxious Trap makes every chase path dangerous, but Ashe is stronger in direct teamfight initiation. Use Hawkshot and allies' vision tools before walking through river or jungle, then force fights where Teemo cannot isolate you with blind and traps.
- Volley is your best damage while blinded; do not panic-auto through Blinding Dart.
- Your 600 range beats his 500 range before he uses Move Quick to close the gap.
- Never chase Teemo in a straight line through unwarded brush after he drops low.
- Mercury's Treads reduce blind duration, but Quicksilver Sash can remove the blind for a decisive late duel.
Buy
TristanaUnfavoured
Ashe has early range and control, but Tristana's Rapid Fire, Rocket Jump, and Buster Shot give her stronger all-in and reset control in a marksman duel.
Watch for Rocket Jump: lets Tristana choose the all-in, land a slow, and stay in range long enough for Rapid Fire to decide the trade.
How to beat
Poke before she jumps and keep Frost Shot active so her walk-up costs health. Save Enchanted Crystal Arrow for Rocket Jump's landing or immediately after Buster Shot, when Tristana cannot freely continue or disengage. If Rapid Fire is running and you have not already landed Arrow, kite out instead of matching autos.
Later Tristana outscales Ashe in straight side-lane DPS and eventually outranges her through Draw a Bead. Ashe's late value is starting fights with Arrow and controlling front-to-back space, not accepting isolated turret-to-turret duels against Tristana.
- Early levels are your best window because Draw a Bead has not yet erased your range edge.
- Do not Arrow before she commits if Buster Shot can knock you away and end your follow-up.
- Volley after Rocket Jump lands helps create enough distance to survive the Rapid Fire window.
- If she uses Rocket Jump defensively, chase only while Frost Shot is already applied.
Buy
TryndamereUnfavoured
Ashe can kite Tryndamere for a while, but Spinning Slash plus Mocking Shout and Undying Rage make killing him before he reaches her unreliable.
Watch for Undying Rage: prevents Tryndamere from dying during Ashe's best burst window and lets him keep chasing through Frost Shot.
How to beat
Stay at max range and never give him a free Spinning Slash angle from brush or fog. Use Enchanted Crystal Arrow after he spins in, then kite backward until Undying Rage is forced. Once his ultimate starts, stop trying to finish him immediately and use Frost Shot, Volley, and terrain to survive the duration.
Later Tryndamere wins most isolated side-lane fights if he has summoners or room to run Ashe down. Ashe should group, use Arrow to start fights away from Tryndamere's split push, and keep peel between herself and his spin path.
- Mocking Shout only works when your back is turned, so turning briefly before it lands can deny the slow if spacing allows.
- Do not spend Arrow before Spinning Slash unless you are sure it will hit from long range.
- Executioner's Calling helps after Undying Rage when he tries to heal with Bloodlust.
- Open areas favor Ashe; brush and lane walls favor Tryndamere.
Buy
Twisted FateEven
Ashe wins sustained autos if she avoids Gold Card, while Twisted Fate wins by locking her down and landing Wild Cards before she can kite.
Watch for Pick A Card Gold Card: point-and-click stun that lets Twisted Fate land Wild Cards and disengage before Ashe gets a long trade.
How to beat
Hold just outside his 525 range while he cycles Pick A Card, then punish after he locks the wrong card or spends Gold Card on a minion. If he walks at you with Gold Card ready, back up first and use Volley rather than giving him the stun. Commit with Arrow when Pick A Card is down, because TF has no combat escape in the duel.
Later Ashe is better in a direct teamfight, but Twisted Fate changes the map with Gate and Destiny. In side lanes, do not overextend without Hawkshot information, and in fights save Arrow for TF if he steps forward with Gold Card ready.
- Your 600 range lets you tag TF before he can card you if Pick A Card is not locked.
- Gold Card is more important than Wild Cards; dodge Q, but do not give up stun range for free.
- Destiny's slow can make your kite fail even if Gate is not used behind you.
- If he uses Gate to arrive near you, Arrow the channel destination or the first Gold Card step.
Buy
TwitchEven
The duel depends on whether Twitch opens from Ambush with full uptime or Ashe reveals and controls him before Expunge stacks build.
Watch for Ambush: lets Twitch start the fight on his terms with attack speed and position before Ashe can set spacing.
How to beat
Do not walk into likely Twitch angles without Hawkshot or wards, because the first two seconds decide the duel. If he appears close, Arrow immediately to break his opening and create distance before Spray and Pray lines up. If you see him first, Frost Shot keeps him from repositioning and Ashe can win before Expunge reaches lethal stacks.
Later Twitch has the scarier invisible side-lane pick and can out-DPS clumped teams with Spray and Pray. Ashe should use Hawkshot proactively, keep fights spread, and start on Twitch when he is revealed instead of waiting for him to open.
- Hawkshot is a real combat tool here; use it on flank paths before farming alone.
- Do not stand behind minions or allies during Spray and Pray, because the bolts pierce.
- If Venom Cask lands first, back up until the slow and poison stack pressure drops.
- Arrow is best used instantly after Twitch reveals, before Expunge becomes lethal.
Buy
VayneUnfavoured
Ashe controls the first range band, but Vayne wins extended duels with Tumble, Silver Bolts, Condemn, and Final Hour stealth.
Watch for Condemn: knocks Ashe away or into terrain, either ending Ashe's chase or stunning her long enough for Vayne to proc Silver Bolts.
How to beat
Fight in open space away from walls and keep Vayne at the very edge of 600 range, where she must Tumble forward to trade. Do not chase into Final Hour stealth without Arrow or Volley ready to cover her reappearance. Commit after Condemn is used, because that is the cooldown that stops Ashe from converting slows into a kill.
Later Vayne is favored in late side-lane duels and shreds Ashe if she gets repeated Silver Bolts procs. Ashe should force teamfights earlier with Arrow, hit whatever is in front, and avoid being the isolated target Vayne wants.
- A wall behind you turns Condemn from disengage into a lost duel.
- Volley can check Vayne's likely path during Final Hour Tumble, but it does not replace real vision.
- Your best trades are one or two autos plus Volley before Silver Bolts completes.
- If Vayne Tumbles aggressively and misses Condemn value, that is your Arrow window.
Buy
VeigarEven
Ashe can kill Veigar quickly if she avoids Event Horizon, but one cage into Dark Matter and Primordial Burst can delete her before she uses her range advantage.
Watch for Event Horizon: traps or stuns Ashe, setting up Veigar's full spell combo and removing her ability to kite.
How to beat
Stand outside Event Horizon cast threat until Veigar uses it, then punish the long cooldown with Arrow and sustained autos. If the cage appears around you, stop at the edge instead of trying to cross the wall and getting stunned. Commit only when you can sidestep Dark Matter or when Arrow lands before he cages.
Later Veigar becomes far more threatening once his burst is high enough to punish one mistake, while Ashe still offers safer long-range engage. In teamfights, stay spread from cage angles and consider spell shield or cleanse items if Veigar is saving everything for you.
- Do not walk through Event Horizon's rim; waiting inside is often better than stunning yourself.
- Arrow can interrupt his setup if fired before he places the cage, but after cage you may not have a clean line.
- Primordial Burst is less AP-scaling against Ashe than against mages, but its base burst still matters.
- Banshee's Veil can completely ruin his cage-first pick attempt.
Buy
WarwickUnfavoured
Warwick's sustain and Infinite Duress let him survive Ashe's poke and force a melee damage window if he reaches ultimate range.
Watch for Infinite Duress: suppresses Ashe and deals damage while Warwick heals through the trade, stopping her kite completely.
How to beat
Keep him at max range and use Frost Shot before he is low enough for Blood Scent to help him chase. Save Arrow for after he commits forward or to stop him before Infinite Duress range, not as random poke. If he suppresses you once without a cleanse item, assume the duel is lost unless he was already nearly dead.
Later Warwick is better at isolated picks and side-lane duels when his ultimate is available, while Ashe is better at forcing clean 5v5 starts. Group with peel, use Hawkshot on jungle entrances, and buy QSS when Warwick is holding R for you.
- Blood Scent makes low-health kiting much worse, so leave earlier than you would against most melee champions.
- Do not let Hungering Strike trades happen for free; each one undoes a chunk of your poke.
- Arrowing him after Infinite Duress is impossible, so respect his range before it starts.
- Executioner's Calling can help grind through his healing, but QSS is the real answer to his ultimate.
Buy
WukongUnfavoured
Ashe can punish Wukong before he engages, but Nimbus Strike plus Decoy and Cyclone give him too many ways to reach and disrupt her.
Watch for Nimbus Strike: closes the gap instantly and sets up Crushing Blow and Cyclone before Ashe can keep the fight at 600 range.
How to beat
Stay away from your minion wave so Nimbus Strike cannot use nearby targets to reach you cleanly. When Wukong uses Decoy, do not fire Arrow into the clone; back up and wait for the real champion to reappear or use Volley to cover the path. Commit only after Nimbus Strike or Cyclone is down, because those are the tools that turn your range advantage off.
Later Wukong wins isolated fights if he can engage from fog or brush, and his Cyclone is also a major teamfight threat. Ashe should keep Hawkshot on flank routes, hold Arrow for his entry, and position far enough back that he must spend dash before reaching her.
- If Wukong walks straight at you without attacking, expect Decoy and do not waste Arrow.
- Standing beside minions gives Nimbus Strike easier access to you.
- Volley is good for clipping him after Decoy because it covers multiple exit angles.
- Cyclone's knockup interrupts your kite even if Frost Shot is already applied.
Buy
ZileanEven
Ashe has stronger sustained damage, but Zilean can double-bomb, slow her, and undo her kill window with Chronoshift.
Watch for Chronoshift: revives Zilean after Ashe commits Arrow and damage, forcing her to win the duel twice.
How to beat
Use range to force Time Bomb trades without letting Time Warp put you in repeated bomb range. If Chronoshift is available, do not spend everything to finish him unless you can kite the revive location afterward. Commit after he uses Time Warp defensively or after Chronoshift expires, because Frost Shot then keeps him from escaping.
Later Zilean is rarely looking for a pure side-lane duel, but his speed, slows, and revive can deny Ashe's pick attempts in teamfights. Ashe should either Arrow a target Zilean cannot ult in time or force Chronoshift first and re-engage after it fades.
- Do not stand near your own minions after a Time Bomb sticks, because he can use the explosion zone to zone your retreat.
- Rewind means one missed Time Bomb does not end his pressure; watch for the second cycle.
- Arrowing Zilean through Chronoshift is usually wasteful unless your team can camp the revive spot.
- Your 600 range matches his, so the duel is about cooldown timing rather than raw spacing.
Buy


No champion by that name.
18- Attack damage
- 308.3
- Ability power
- 0
- Armor
- 141.7
- Magic resist
- 84.6
- Attack speed
- 1.592
- Cooldown reduction
- 0%
- Critical strike chance
- 55%
- Move speed
- 388.5


Click an item to leave it out of the numbers.
Resources
- Health
- 1,955
- Health regen
- 14.4 / 5s
- Mana
- 803
- Resource regen
- 13.5 / 5s
Offense
- Attack range
- 600
- Crit chance
- 55%
- Crit damage
- 250%
- Life steal
- 12%
- Spell vamp
- 0%
Penetration
- Armor pen, flat
- 0
- Armor pen, percent
- 43%
- Lethality
- 6
- Magic pen, flat
- 0
- Magic pen, percent
- 0%
Ability damage
at this build's ranks- W
Volleyrank 5/5
- Damage
- 396
- R
Enchanted Crystal Arrowrank 3/3
- Main Damage
- 612
- Splash Damage
- 306
Before the target's resistances — Classic ships no damage type on these formulas.
Auto-attack DPS
at level 18- Attacks per second
- 1.592
- Average hit
- 573.9
- Normal hit
- 314.5
- Critical hit
- 786.2
- Armor after penetration
- 0
- Magic resist after penetration
- 0
- Damage increase
- +2%
- Life steal healing
- 109.7 / s
- Time to kill
- 1.1s
Basic attacks only — no abilities beyond the on-hit ones above, and none of the effects the calculator could not model. Crits are averaged into the per-second number.
18- Attack damage
- 97.6
- Ability power
- 538.15
- Armor
- 85.7
- Magic resist
- 30
- Attack speed
- 1.105
- Cooldown reduction
- 40%
- Critical strike chance
- 0%
- Move speed
- 370
Click an item to leave it out of the numbers.
Resources
- Health
- 2,197
- Health regen
- 14.4 / 5s
- Mana
- 875
- Resource regen
- 28.5 / 5s
Offense
- Attack range
- 600
- Crit chance
- 0%
- Crit damage
- 200%
- Life steal
- 0%
- Spell vamp
- 0%
Penetration
- Armor pen, flat
- 0
- Armor pen, percent
- 0%
- Lethality
- 0
- Magic pen, flat
- 9
- Magic pen, percent
- 8%
Ability damage
at this build's ranks- W
Volleyrank 5/5
- Damage
- 181
- R
Enchanted Crystal Arrowrank 3/3
- Main Damage
- 1,161
- Splash Damage
- 580
Before the target's resistances — Classic ships no damage type on these formulas.
Auto-attack DPS
at level 18- Attacks per second
- 1.105
- Average hit
- 127
- Normal hit
- 127
- Critical hit
- 226.5
- On-hit damage
- 27.4
- Armor after penetration
- 0
- Magic resist after penetration
- 0
- Damage increase
- +2%
- Time to kill
- 7.1s
On-hit
- Spellsword27.4
5% of ability power · magic damage
Basic attacks only — no abilities beyond the on-hit ones above, and none of the effects the calculator could not model. Crits are averaged into the per-second number.
18- Attack damage
- 97.6
- Ability power
- 0
- Armor
- 76.7
- Magic resist
- 30
- Attack speed
- 1.105
- Cooldown reduction
- 0%
- Critical strike chance
- 0%
- Move speed
- 325
Resources
- Health
- 1,817
- Health regen
- 14.4 / 5s
- Mana
- 803
- Resource regen
- 13.5 / 5s
Offense
- Attack range
- 600
- Crit chance
- 0%
- Crit damage
- 200%
- Life steal
- 0%
- Spell vamp
- 0%
Penetration
- Armor pen, flat
- 0
- Armor pen, percent
- 0%
- Lethality
- 0
- Magic pen, flat
- 0
- Magic pen, percent
- 0%
Ability damage
at max rank- W
Volleyrank 5/5
- Damage
- 178
- R
Enchanted Crystal Arrowrank 3/3
- Main Damage
- 600
- Splash Damage
- 300
Before the target's resistances — Classic ships no damage type on these formulas.
Auto-attack DPS
at level 18- Attacks per second
- 1.105
- Average hit
- 97.6
- Normal hit
- 97.6
- Critical hit
- 195.2
- Armor after penetration
- 0
- Magic resist after penetration
- 0
- Time to kill
- 9.3s
Basic attacks only — no abilities beyond the on-hit ones above, and none of the effects the calculator could not model. Crits are averaged into the per-second number.
18- Attack damage
- 353.3
- Ability power
- 0
- Armor
- 85.7
- Magic resist
- 30
- Attack speed
- 1.105
- Cooldown reduction
- 40%
- Critical strike chance
- 15%
- Move speed
- 385
Click an item to leave it out of the numbers.
Resources
- Health
- 2,017
- Health regen
- 28.4 / 5s
- Mana
- 983
- Resource regen
- 23.5 / 5s
Offense
- Attack range
- 600
- Crit chance
- 15%
- Crit damage
- 200%
- Life steal
- 12%
- Spell vamp
- 0%
Penetration
- Armor pen, flat
- 0
- Armor pen, percent
- 43%
- Lethality
- 6
- Magic pen, flat
- 0
- Magic pen, percent
- 0%
Ability damage
at this build's ranks- W
Volleyrank 5/5
- Damage
- 442
- R
Enchanted Crystal Arrowrank 3/3
- Main Damage
- 612
- Splash Damage
- 306
Before the target's resistances — Classic ships no damage type on these formulas.
Auto-attack DPS
at level 18- Attacks per second
- 1.105
- Average hit
- 414.4
- Normal hit
- 360.4
- Critical hit
- 720.7
- Armor after penetration
- 0
- Magic resist after penetration
- 0
- Damage increase
- +2%
- Life steal healing
- 55 / s
- Time to kill
- 2.2s
Basic attacks only — no abilities beyond the on-hit ones above, and none of the effects the calculator could not model. Crits are averaged into the per-second number.